Sunday, December 26, 2021

Happy New Year!

Lordy, lordly - how quickly the Christmas festivities have come and gone. I personally become sad after all of it is over. It is such a happy time in my life especially with having grandchildren who are so excited with every gift they open.

And without a blip, I am now getting Valentine's Day emails filled with project ideas.

BUT FIRST THERE IS....


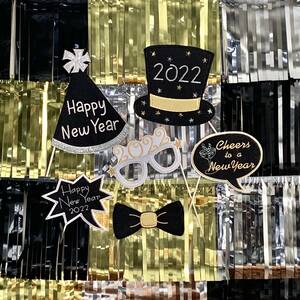
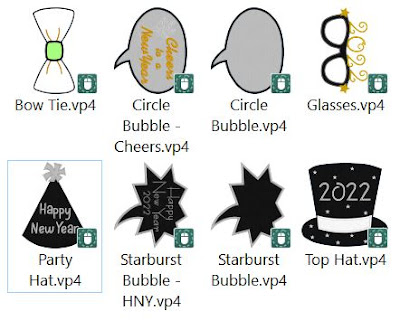
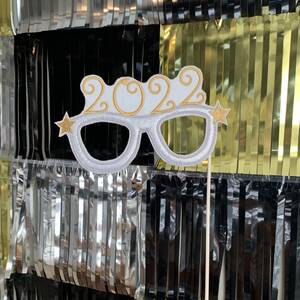
Husqvarna Viking along with mySewnet.com have a FREE collection called  New Years Eve Photo Props.


They have also included a pdf sheet of instructions for you to download on their mySewnet site.  Have you signed up for your own account yet?  Be sure to do because they are offering FREE designs for download and you will own them forever.

Here is the link they have to connect you to the information above.  Included is both the pdf directions and the VP4 files to send to your cloud.  


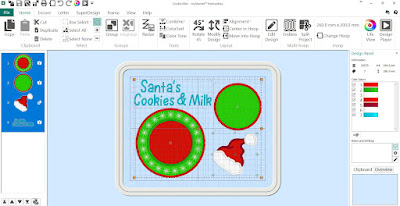
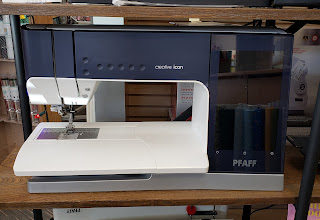
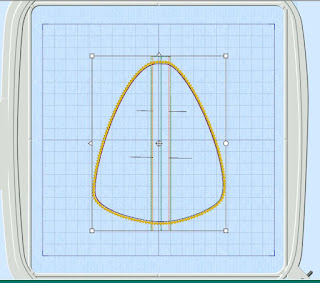
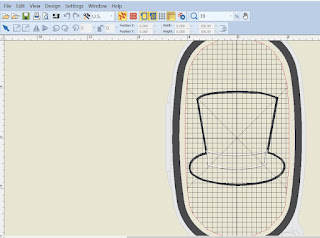
If your machine does not read VP4 files, then download the FREE Basic mysewnet software here and convert it to a VP3 file.  If you use a different file format, EXPORT it to VP3 and then open up the FREE software for your particular brand of embroidery machine. Here I am using the Free Bernina Artlink 8 software.  A strange occurence is that it did not bring in the 2022 but you can add it with the fonts on your machine.


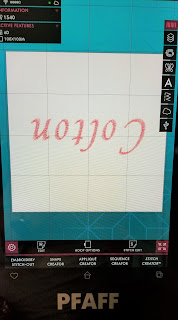
Since I have the Silver version of the software I am able to export it as a JEF file for my multineedle machine. This is pretty handy since I know many of us own more than one machine.


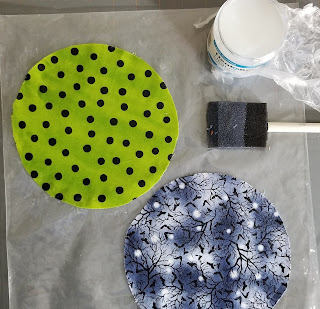
Today I am off to play and you will see in the next few blog posts what I am 'playing' with.


Tuesday, December 21, 2021

FREE mySewnet Design


Yes, that is correct - FREE!  YOu can donwload this Santa mat and stitch one up for your very special little one just in time for Santa's arrival.


You can find the file here along with the pdf for the instructions. If you don't have a mySewnet account yet, be sure to sign up for one here.


This is pretty exciting as this is the first FREE Holiday mySewnet design that they have offered.  If you have an Epic 2, you can now access this design right from your machine's embroidery screen.

And it wil be available soon on the Pfaff Creative icon 2 coming this spring. Yippee!

Let's get stitchin'


Sunday, December 19, 2021

Dollar Tree Junkie


My non-sewing friend calls me a Dollar Tree Junkie and I just laugh because I really am one!  when I realized I had to get my grands gift box out the door, I ran to the Dollar Tree and picked up the last two glitter snowflakes stockings they had. I filled them with Dollar Tree' stuff' and candy.  My granddaughter got Skittles because she doesn't like chocolate- I just don't get it!


So I decided to embroider their names and it was so quick and easy, they were done and in the box in about an hour.

I hooped the 100 x 100 mm metal hoop with Sticky Back tear away stabilizer and marked the line for their names. Then I pulled to stocking top so it layed flat on the hoop with the right side of the fur up.  I programmed his name and turned it 180 degrees so it would read correctly when you turned the fur top back down againset the stocking.  Make sense?  I laid a water soluble stabilizer on top which is a must when working with any type of fabric with nap.


I used the magnets to keep the stockins away from the stitching area.  What I really needed was the Creative Hoop Metal Guide set.  It is perfect for these small areas.  I need to add that to my Christmas list.


Here is what they looked like when I finished them.  Dakota's name is hard to read but you get the idea.


If you would like Santa to bring you a Creative icon, we have a used one in perfect condition and it can be under your tree on Christmas Eve.  If you are like me, I am my own Santa! check out the details below.  Stop by the store on Monday for a demonstration of this fabulous machine.


Stop by tomorrow for a another quick and easy idea.


Saturday, December 18, 2021

Last Minute Gift Ideas


Only 1 week until Christmas Day!  Are you ready yet?  Not me, the only thing I have managed to accomplish is to mail my grandchildren's gifts.  But I do consider it a BIG accomplishment.  I had to fit int two gifts that were odd shape, like a stuffed animal.  So I dug into my scrap Christmas fabric- c'mon I know you have one- and made two quick and easy gift bags.

My granddaughter wanted the popular 'Pop it Figet' toys and I found a few rainbow designs on Amazon.  The box didn't fit into the shipping box I had but the fabric bag could be squished into a space. Viola! Yes, I created the gift tag to match but you do know that a store bought tage would work as well.


For my grandson I made a larger gift bag to hold his Marshall stuffed toy and matching blanket.  Again I needed to squish it into a space, so this was perfect.


You can find a quick and easy pattern by Karen Charles on the Husqvarna Viking page here. 


I cut up my scraps and sewed strips to the top to add to the bag.  I just inserted ribbon as the drawstrings and skipped the beads. But as you can see you can embroider a quick design for that special person in your life.


You don't really need a top of the line machine to make these gift bags.  We have a fabulous pre-loved Passport 3.0 which would be a perfect gift for someone to make these last minute gift ideas. Contact the store for more information.

Stop back tomorrow for a quick Dollar Tree gift idea.


Sunday, October 31, 2021

Happy Halloween Witches!

Happy Halloween!  Why? you ask.  When my kids were growing up I tried to make the holidays really meaningful and it put a lot of stress on this teacher mom.  So with Halloween all I had to do was buy some candy and make a costume.  The only Halloween fabric then were orange and black solids!

My favorite Halloween movie is Hocus Pocus. So of course I had to watch it again this year and I am anxious for Hocus Pocus 2 of course.


I have to admit that I started this design last year and I had only a few designs added to the hat.  But this year I was inspired to finish it and hang it up in the store.  

The project was designed to feature the built in designs on the Pfaff Creative icon, but darn if a few ladies didn't talk me into teaching it!  The hardest part was going back and trying to write directions for what I did! 

Then a customer wanted one for her Epic 2 and I actually had time to design one at the store and stitch it up before Halloween. And yes, all of the designs are in the machine except for the witches hat.

I was so excited when a few of the ladies shared their finished projects with me.  Cindy C added a few hanging spiders and made it into a mini quilt with the added binding and a sleeve to the back.

Vivian E had a totally different idea and bought a frame on clearance at Hobby Lobby.  Notice the bow? It covers up the scratch on the frame.


It matched  the rest of her spooky Halloween decorations perfectly.


I hope you have been inspired in some way by the 10 Days of Halloween ideas! If you are ever in the Tampa Bay area, come and visit us.  We would love to see you!


Saturday, October 30, 2021

Day 10 Are you Crazy for Candy Corn?

Are you crazy for anything candy corn?


I have to tell you that I am not a fan of candy corn candy but I am a fan of candy corn sewing and quilting! We have 2 bolts of this super cute candy corn fabric at the store and I couldn't resist buying some.


But what to make with it? I found this table runner on Krista Moser's site here.


And I thought I could get a topper done by Halloween but I am not sure if I am going to make it! She has very thorough directions and I think I should just save this for next year.

So with only 24 hours until Halloween I set out to find some quick and easy candy corn projects.  Deb's Days has a cute blog post with a candy corn potholder- simple and quick to make with scraps.  You can find the link to her supply list and video tutorial here.


Last year Janome had a really cute and quick Candy Corn pouch pattern and FB live.  I am all about watching any video for inspiration.  


They included both patterns and vip format.  The link to the FB live video is here. If you do not have any software to open these files, don't forget you can download a free version of mySewnet here.


Well it looks like I may not have time to do too much today but I did find an svg for a quick pair of Candy Corn earrings.


Go out and have a spooky terrific day!


Friday, October 29, 2021

Day 9 Cute Halloween Treat Trays

I was digging through my Halloween fabrics and I found a whole bunch of scraps that I could actually use.  So I sorted all of the pieces by color and size.  Small pieces went into a basket and the larger pieces went into a plastic bin.

At first I thought of throwing them away but I was inspired by Judy W who is making scrappy quilts and I thought 'I should do this!"  Then I thought I might be able to find a few projects to use the scraps or maybe not...

I searched Google and came up with a few cute ideas.

I found these Halloweeen Reusable Treat trays here  Thermoweb Blog and started digging through the bin. 


The blog post details all of the steps to make the trays.  Rather than create a circle template, I used my circle Savvy ruler by Creative Grid.


I cut out a 7 inch circle with two scraps of fabric and coated them with the Heat n Bond Liquid Vinyl as per directions. I put a sheet of Press n Seal on top before screwing on the cap to keep it from drying out.


I then placed a piece of batting on the bottom and sewed the circles together -right sides together leaving a small opeing for turning.


I followed their directions to finish the treat tray and it is now ready for some candy.  I guess I should go buy some!


Have you bought your candy yet?   We go to our son's home for Halloween and so I only give out some treats to a few of the neighboor girls. The less candy around, the better!


Thursday, October 28, 2021

Day 8 Pumpkins and more

You know it must be fall when the Pumpkin Spice coffee hits the shelves! Love it or hate it, the flavor is what starts the season.  I went to Dunkin (its new name) and there wasn't any left. The guy told us the season is over.  Not for me, though.


Pumpkins are seasonal decor and you will find them everywhere. The iconic carved pumpkin will be happening in the next few days because if you carve it earlier, it rots before Halloween!


I love making pumpkins and I have been making them for years but when the Creative icon came out I was able to add a whole new look with the floating stitches! Here is my practice sample using Floriani orange and black twisted thread in both the needle and the bobbin. Love it!  

I taught this class in 2018 and we had a few requests for the class again, so I am teaching it again on Friday.


It is a great lesson in using Perfect Positioning and using designs from your machine, both the Epic and Epic 2 and the icon.


But the best part was joining the pieces with the floating stitches.  Using a black 40 wt polyester thread in both the needle and bobbin really gives a dramtic effect.


This class they can either make the Halloween or the Fall pumpkins. Using varigated thread in both needle and bobbin and adding felted leaves and creative twist paper changes the design completely.


Don't forget there are two other models that have the floating stitches the Quilt Expression 720 and the Performance icon. Iris M made this pumpkin on her new 720.  Instead of a the embroidery designs she added a Maxi Art stitch and added decorative stitches in the middle. How clever!


I hope that gives you some inspiration ro make your own seasonal pumpkins. Stop back tomorrow for more Halloween ideas.


Happy Valentine's Day!

Well, not exactly but it is on the horizon.  This is my second favorite holiday and I love making all of the heart designs and of course the...