Friday, March 27, 2020

Scrap & Sew Along starting soon!


I am excited to share with you all, our very first Sew Along at Scrap & Sew! Many times in my life I have had to go to a "Plan B", have you? This is such a challenging time for all of us and since my classes have been canceled at this time, I have decided to start a ' Sew Along'.  I dug through a number of my classes to find something that I thought would work. So starting Monday I will be featuring blog posts so you too can 'sew along' with me.

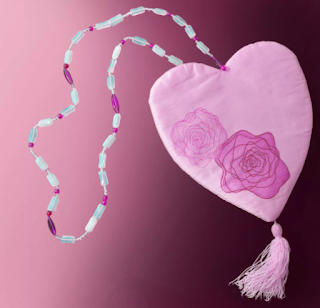
Starting Thursday April 2nd is my Fat Quarter Flap bag. I designed this pattern in 2001-WOW- after spending all day working at a store cutting fat quarters.  It was very popular and I sold a ton of patterns.  After about 2 years, there were so many bag patterns on the market, I decided it was time for a change.

The supplies are minimal and perfect for all of those fat quarters that you have been saving a project... You will need 7 fat quarters or cut your yardage into a 18" x 22" piece. Any sewing machine will be fine since you will only need a straight stitch.  I will be working on my Pfaff Creative Icon.

The next Sew Along will feature the Silhouette Cameo and your embroidery machine.  It will begin Monday April 13th.   It will feature the free Cupcake pillow project from Kimberbell's web site. I am using a charm square pack for my project, but scraps will work as well.


Lastly, I will be featuring a serger Sew Along using a basic 4 thread stitch, so any overlock machine will work.  I am using the Pfaff 4872.  It will start Thursday April 23rd.  It is a small baby quilt perfect for tummy time.

I hope you will be able to join me and use up your stash as well.  Don't forget to sign up for emails alerts ( upper right hand corner of the page) so you don't miss any posts.

If you have any questions, just post them in the comments.  See you on Monday!


Wednesday, March 18, 2020

Facebook Live on March 19th

Life has indeed taken an unusual turn.  I am on 'house arrest' (just kidding) by my family due to a comprised immune system.  I was all ready to present this demonstration at the OSQ Expo, so I decided to do a FB live event instead.  It will be my very first, so expect chaos. :)

If you would like to stitch along, here is what you will need.  You don't really need a fancy machine, just a sewing machine with decorative stitches.  

If you have a Sew Steady table or an extension table, set it up to make a flat surface.  Select several spools of thread going from light to dark or use a variegated thread.

If you are lucky enough to have a multi spool thread rack, then set up your colors using a light and dark of each.  

Otherwise, just line them up (like little soldiers) in the order you want to stitch them out.

Next wind several bobbins in either white or black thread.  I am using black fabric so I wound 3-4 bobbins with black embroidery thread.  I like to purchase large spools of white and black, but you can use the smaller size spool as well.

Next, cut a black or white piece of fabric 16" x 22".  I like to cut my fabric larger in the event it shrinks.  Starch or soak in Terial Magic to add another layer of stiffness.  When I use the Terial Magic on a larger piece of fabric, I add the liquid to a zip lock bag and then squeeze it to distribute it.  This gives a much better coverage rather than spraying it.


Wring it out and hang to dry.  I usually use the towel rod for this.


It doesn't take long to dry and then when you iron it you will see how stiff the fabric becomes.  The next step is to cut it into 5.5" x 10" strips. I was able to get 4 pieces out of my fabric piece.


Lastly, mark each piece 1" from the raw edge on the short end.  You will need a layer of Tear Away stabilizer for your decorative stitching.   I like to use black for the store samples but white works fine for your own samples.


Feel free to stitch along with me or just use this blog post to prep your fabric.

Part II will be posted after the FB Live event.


Happy Valentine's Day!

Well, not exactly but it is on the horizon.  This is my second favorite holiday and I love making all of the heart designs and of course the...