Sunday, October 31, 2021

Happy Halloween Witches!

Happy Halloween!  Why? you ask.  When my kids were growing up I tried to make the holidays really meaningful and it put a lot of stress on this teacher mom.  So with Halloween all I had to do was buy some candy and make a costume.  The only Halloween fabric then were orange and black solids!

My favorite Halloween movie is Hocus Pocus. So of course I had to watch it again this year and I am anxious for Hocus Pocus 2 of course.


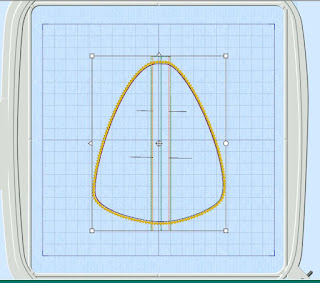
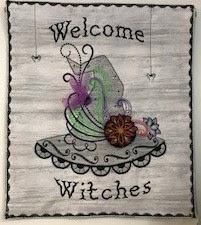
I have to admit that I started this design last year and I had only a few designs added to the hat.  But this year I was inspired to finish it and hang it up in the store.  

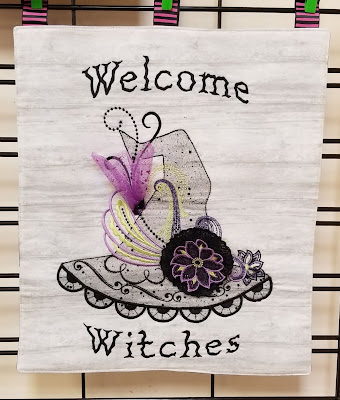
The project was designed to feature the built in designs on the Pfaff Creative icon, but darn if a few ladies didn't talk me into teaching it!  The hardest part was going back and trying to write directions for what I did! 

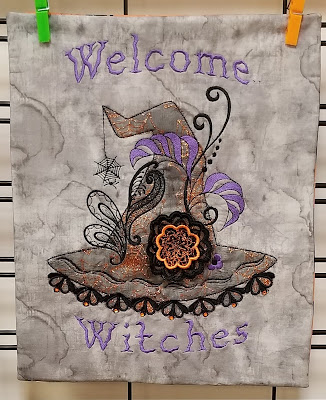
Then a customer wanted one for her Epic 2 and I actually had time to design one at the store and stitch it up before Halloween. And yes, all of the designs are in the machine except for the witches hat.

I was so excited when a few of the ladies shared their finished projects with me.  Cindy C added a few hanging spiders and made it into a mini quilt with the added binding and a sleeve to the back.

Vivian E had a totally different idea and bought a frame on clearance at Hobby Lobby.  Notice the bow? It covers up the scratch on the frame.


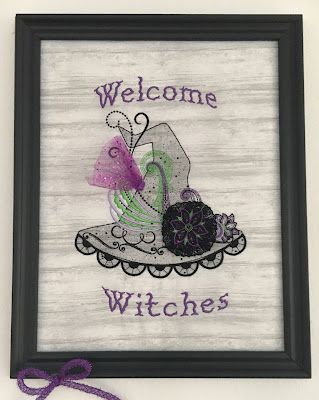
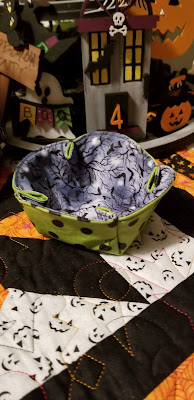
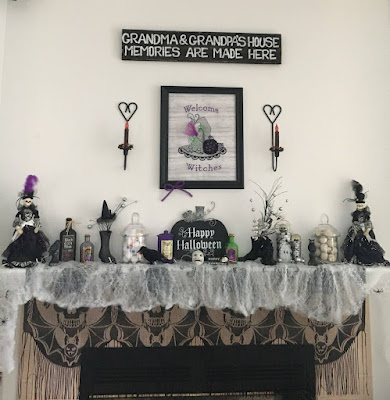
It matched  the rest of her spooky Halloween decorations perfectly.


I hope you have been inspired in some way by the 10 Days of Halloween ideas! If you are ever in the Tampa Bay area, come and visit us.  We would love to see you!


Saturday, October 30, 2021

Day 10 Are you Crazy for Candy Corn?

Are you crazy for anything candy corn?


I have to tell you that I am not a fan of candy corn candy but I am a fan of candy corn sewing and quilting! We have 2 bolts of this super cute candy corn fabric at the store and I couldn't resist buying some.


But what to make with it? I found this table runner on Krista Moser's site here.


And I thought I could get a topper done by Halloween but I am not sure if I am going to make it! She has very thorough directions and I think I should just save this for next year.

So with only 24 hours until Halloween I set out to find some quick and easy candy corn projects.  Deb's Days has a cute blog post with a candy corn potholder- simple and quick to make with scraps.  You can find the link to her supply list and video tutorial here.


Last year Janome had a really cute and quick Candy Corn pouch pattern and FB live.  I am all about watching any video for inspiration.  


They included both patterns and vip format.  The link to the FB live video is here. If you do not have any software to open these files, don't forget you can download a free version of mySewnet here.


Well it looks like I may not have time to do too much today but I did find an svg for a quick pair of Candy Corn earrings.


Go out and have a spooky terrific day!


Friday, October 29, 2021

Day 9 Cute Halloween Treat Trays

I was digging through my Halloween fabrics and I found a whole bunch of scraps that I could actually use.  So I sorted all of the pieces by color and size.  Small pieces went into a basket and the larger pieces went into a plastic bin.

At first I thought of throwing them away but I was inspired by Judy W who is making scrappy quilts and I thought 'I should do this!"  Then I thought I might be able to find a few projects to use the scraps or maybe not...

I searched Google and came up with a few cute ideas.

I found these Halloweeen Reusable Treat trays here  Thermoweb Blog and started digging through the bin. 


The blog post details all of the steps to make the trays.  Rather than create a circle template, I used my circle Savvy ruler by Creative Grid.


I cut out a 7 inch circle with two scraps of fabric and coated them with the Heat n Bond Liquid Vinyl as per directions. I put a sheet of Press n Seal on top before screwing on the cap to keep it from drying out.


I then placed a piece of batting on the bottom and sewed the circles together -right sides together leaving a small opeing for turning.


I followed their directions to finish the treat tray and it is now ready for some candy.  I guess I should go buy some!


Have you bought your candy yet?   We go to our son's home for Halloween and so I only give out some treats to a few of the neighboor girls. The less candy around, the better!


Thursday, October 28, 2021

Day 8 Pumpkins and more

You know it must be fall when the Pumpkin Spice coffee hits the shelves! Love it or hate it, the flavor is what starts the season.  I went to Dunkin (its new name) and there wasn't any left. The guy told us the season is over.  Not for me, though.


Pumpkins are seasonal decor and you will find them everywhere. The iconic carved pumpkin will be happening in the next few days because if you carve it earlier, it rots before Halloween!


I love making pumpkins and I have been making them for years but when the Creative icon came out I was able to add a whole new look with the floating stitches! Here is my practice sample using Floriani orange and black twisted thread in both the needle and the bobbin. Love it!  

I taught this class in 2018 and we had a few requests for the class again, so I am teaching it again on Friday.


It is a great lesson in using Perfect Positioning and using designs from your machine, both the Epic and Epic 2 and the icon.


But the best part was joining the pieces with the floating stitches.  Using a black 40 wt polyester thread in both the needle and bobbin really gives a dramtic effect.


This class they can either make the Halloween or the Fall pumpkins. Using varigated thread in both needle and bobbin and adding felted leaves and creative twist paper changes the design completely.


Don't forget there are two other models that have the floating stitches the Quilt Expression 720 and the Performance icon. Iris M made this pumpkin on her new 720.  Instead of a the embroidery designs she added a Maxi Art stitch and added decorative stitches in the middle. How clever!


I hope that gives you some inspiration ro make your own seasonal pumpkins. Stop back tomorrow for more Halloween ideas.


Wednesday, October 27, 2021

Day 7 Only for Looks

 This is an easy project to finish just in time for the holiday. A few days ago I posted a project that I had started based on a Viking blog post.  If you missed it, you can find it here.

So I had this length of ribbon and decided it was too pretty to be useful! we always have towel blanks at the store, so I selected a solid black towel and added the ribbon down the center of the towel.  It looked quite lonely on the towel, so I decided to check out some of the designs and lettering on the machine. I created the line of stitching and decided to sew out a practice sample.  I drew a chalk line 1" from the edge of the ribbon and used 'Glow in the Dark' thread.


This laser feature on the Epic 2 is fabulous and I am waiting patiently for the icon 2 to come out, that's for sure!

Notice how easy it is to stitch a straight line of lettering when you have the laser on. I combine a 9mm black cat silhouette with the Comic 12mm lettering and I absolutely love how it stitched out.


When I don't know what I am going to do with a design I either make a pillow or a towel. These projects are made 'only for looks' meaning DO NOT USE!  Is anyone else like that?

I decided early on it would have to have some kind of trim becuse this fabric was begging to be added it to the towel.


I decided to dig out my ruffler and make pleats with it rather than ruffles. If you need a refresher in how to use the ruffler, Cindy made a You Tube video on the Scrap and Sew channel.  She explains how to put it on the machine and how to set it up.


The finished towel is now in its place of honor and is just for looks only!


Stop by tomorrow for Day 8 of Halloween project ideas.  Thanks for stopping by.


Tuesday, October 26, 2021

Day 6 BOO to you!

Have you turned on your Pfaff Creative icon or Viking Epic or Epic 2 this week?  I am always excited when I see the little envelope next to the blog. "You've got mail!" is what I hear in my head.  This is one of my favorite features about my machine!


'Before covid' I taught a class designed around the blog and using the free designs they give us.  I was happy to see these designs back on the blog again.


I created the letters in Appliqué Creator selecting my 360 x 260mm hoop. This allowed me to make these big letters. I deleted the satin stitching, which left the placement and tackdown stitching. I used chalkboard fabric so when I trimmed out the fabric, it left a neat finish.

I followed the directions for the bat except I used a sheet of glitterflex for his body.  when you remove the clear topping, it can be applied just like fabric.


For the ghost, I sandwhiched some polyester organza between the vinyl and then trimmed them all before the satin stitching.


The pumpkin is the same one on the blog, I just resized it and made it longer. I also added an orange vinyl rather than fabric to give it the shiny look.


I hope you are inspired to try out some of these designs.  But do remember to save them to your machine so you can have them on your cloud.


Monday, October 25, 2021

Day 5 Running Around in Circles?

Everyone knows that Halloween starts the holiday season in the US, right?  I suspect pretty soon all of us will be running around in circles. so let's do this right and break out the Circular Attachment!

Pfaff Circular Attachment
Husqvarna Viking Circular Attachment 

I fell in love with the vintage circular attachment with the rubber stopper and used it often on my 7570.  But living in Florida, the rubber rotted and that was the end of it.

Today's tool is much more than just circles as you can see in the picture above. Cindy used it to add the binding to the bottom circle for her flipping out tote. So clever!


I love using it and have taught several classes with different project ideas.  One of my favorites is my Jack Skellington place mat.  I combined the perfect circles with the stitches on the Creative icon, including the floating stitches. I am the 'queen' of decorative stitches, which is the reason I bought my 7550 in the first place!


But today's project is something different. "Before covid" (I am using this as a marker in our lives) I taught a class using stuffed circles to create a stack of pumpkins. Not totally my idea since I saw it on the Therm-o-web site, I just mixed it up a bit.


I cut several squares of fabric scraps and started stitching circles with right sides together adjusting the slider, which makes them the various sizes.  I cut them with the pinking shears and snipped a hole in the center. I turned them right side out and stuffed them with fiberfill.


Then I used a extra long doll needle and embroidery floss and stitched the sections into place, pulling the floss as tight as I could.


The last step is to stack them in order with the cut side up and use a very long length of floss and thread the sections together.  Start from the top and stitch all of them together and oull tightly. I added a sloppy bow (they are the rage now) and stitched it to the top.


One of the ladies in the class made a Halloween 'Stack o' Pumpkins and I thought it was so cute!

I am working on another stack right now for Christmas and I will share when it is finished.  I hope you are enjoying this countdown.  


Happy Valentine's Day!

Well, not exactly but it is on the horizon.  This is my second favorite holiday and I love making all of the heart designs and of course the...