
Let's begin.

The Front Top Band
Pin or clip the RIGHT side of the top band from FQ #4 to the INSIDE of the front bag at the upper edge.

Stitch using a 1/4" seam.

Trim and press the band over to the front side of the bag. The seam should sit on the top edge of the bag. Press and stitch close to the pressed edge. Sttch again at the seam edge. Set this section aside.

The Back Top Band and Flap
This step is alittle tricky and does not makes sense, but trust me and stay with me here.
Pin the WRONG side of the flap to
the INSIDE of the back bag at the upper edge, centering it on the bag. Baste. Janet F found my mistake-I put the wrong picture in the post and deleted the correct one. Here is her step done correctly.

Pin the RIGHT side of the top band from FQ #3 top band on the RIGHT side
of the flap and stitch across the top of the bag. Trim the seam allowance and press the flap to
the outside of the bag. Edge stitch along the pressed edge and top edge of the seam.
Here is what it will look like.

Stitching the Sides and Bottom of the Bag - French Seams
**I wanted to create a clean finish on the inside and the French seam is the best way to accomplish this. However some of your machines may not have the piercing power to go through all of the layers of this bag. I would recommend that you stitch the bag and then finish the seams with a zizag stitch if you feel like your machine will not feed the fabric through without breaking a needle.
To create the French seam, clip the wrong sides of bag together at the
side and bottom seams, matching the top bands of the bag. It is not absolutely necessary to match the top bands perfectly as the strap will cover any inperfections.

Insert a Topstitch 100/16 needle. Sew a ½ “ seam. I used the edge of my OA foot.

Trim seam allowance to ¼ “ and turn bag,
inside out. Press flat and stitch side and bottom seam again. This time the seam allowance is 1/4".
Boxing the Corners


Boxing the Corners
Before you sew the corners, trim as much of the batting and fabric as you can.

To form the corners, fold corners matching the side and bottom seams. Clip the corners together.

Because of the thickness of this seam, it is a good idea to take out the multipurpose tool and set it up as you see below.

This tool is very helpful it getting your faabric to feed through the machine. Sew
SLOWLY. This step takes patience as it is so thick. Follow the same steps with the other corner.
Boxed corners of your bag. Do not worry if the seam shows, the bottom base with cover them.

Attaching the Straps
Be sure to trim out the extra bulk in the seam as well. YOu will attach the straps to the outside covering up where the top bands meet.

Fold the strap under about 1.5". I used a clip to attach it to the bag.

I turned the bag inside out so I could place it easier under my needle and stitch it in place. Again sew SLOWLY as it is pretty bulky in this spot as well. Repat for the other side. Turn the bag out- you are almost finished.

Bottom Cover
You should have two pieces left and these are for the bottom cover. The original directions said to use a piece of plastic canvas. I would recommend Craft Tex or Tim Tex instead.
As you can see I used the white fabric. Not the best color ideally but I will go with it. Press 1/4" to the inside of each fabric piece. The Craft Tex is 3.5" x 8.5"

Stitch the long sides and along the bottom- opposite from the pressed edges. The stitching forms a U shape. Turn and press flat.

To insert the Craft Tex, I folded it half and pushed it in. Stitch across the folded edge. You are done!

Insert the cover into the bottom of the bag.

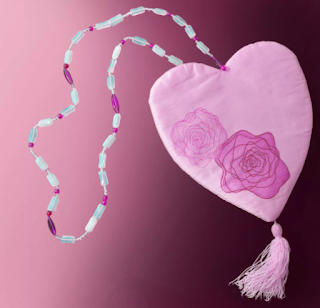
Here are a few pictures of the bag.
Front and Back of the Bag


Front Pocket and inside Flap of the Bag

Thank you for participating in our first Scrap and Sew Along. Our next Sew Along begins April 13th. Come join us!


No comments:
Post a Comment